Guide to Building Wall Masks.
This method should work for any map depending on the fidelity of it but even irregular maps like cave can be easily masked out.
Requirements
The below instructions are for using freely available tools GIMP and potrace you can of course use proprietary tools to achieve the same results but there is no guarantee it will behave the same.
Below I will show 2 methods.
- One method is for dungeons and pre-made maps
- The other method is for irregular maps and custom maps.
Method One
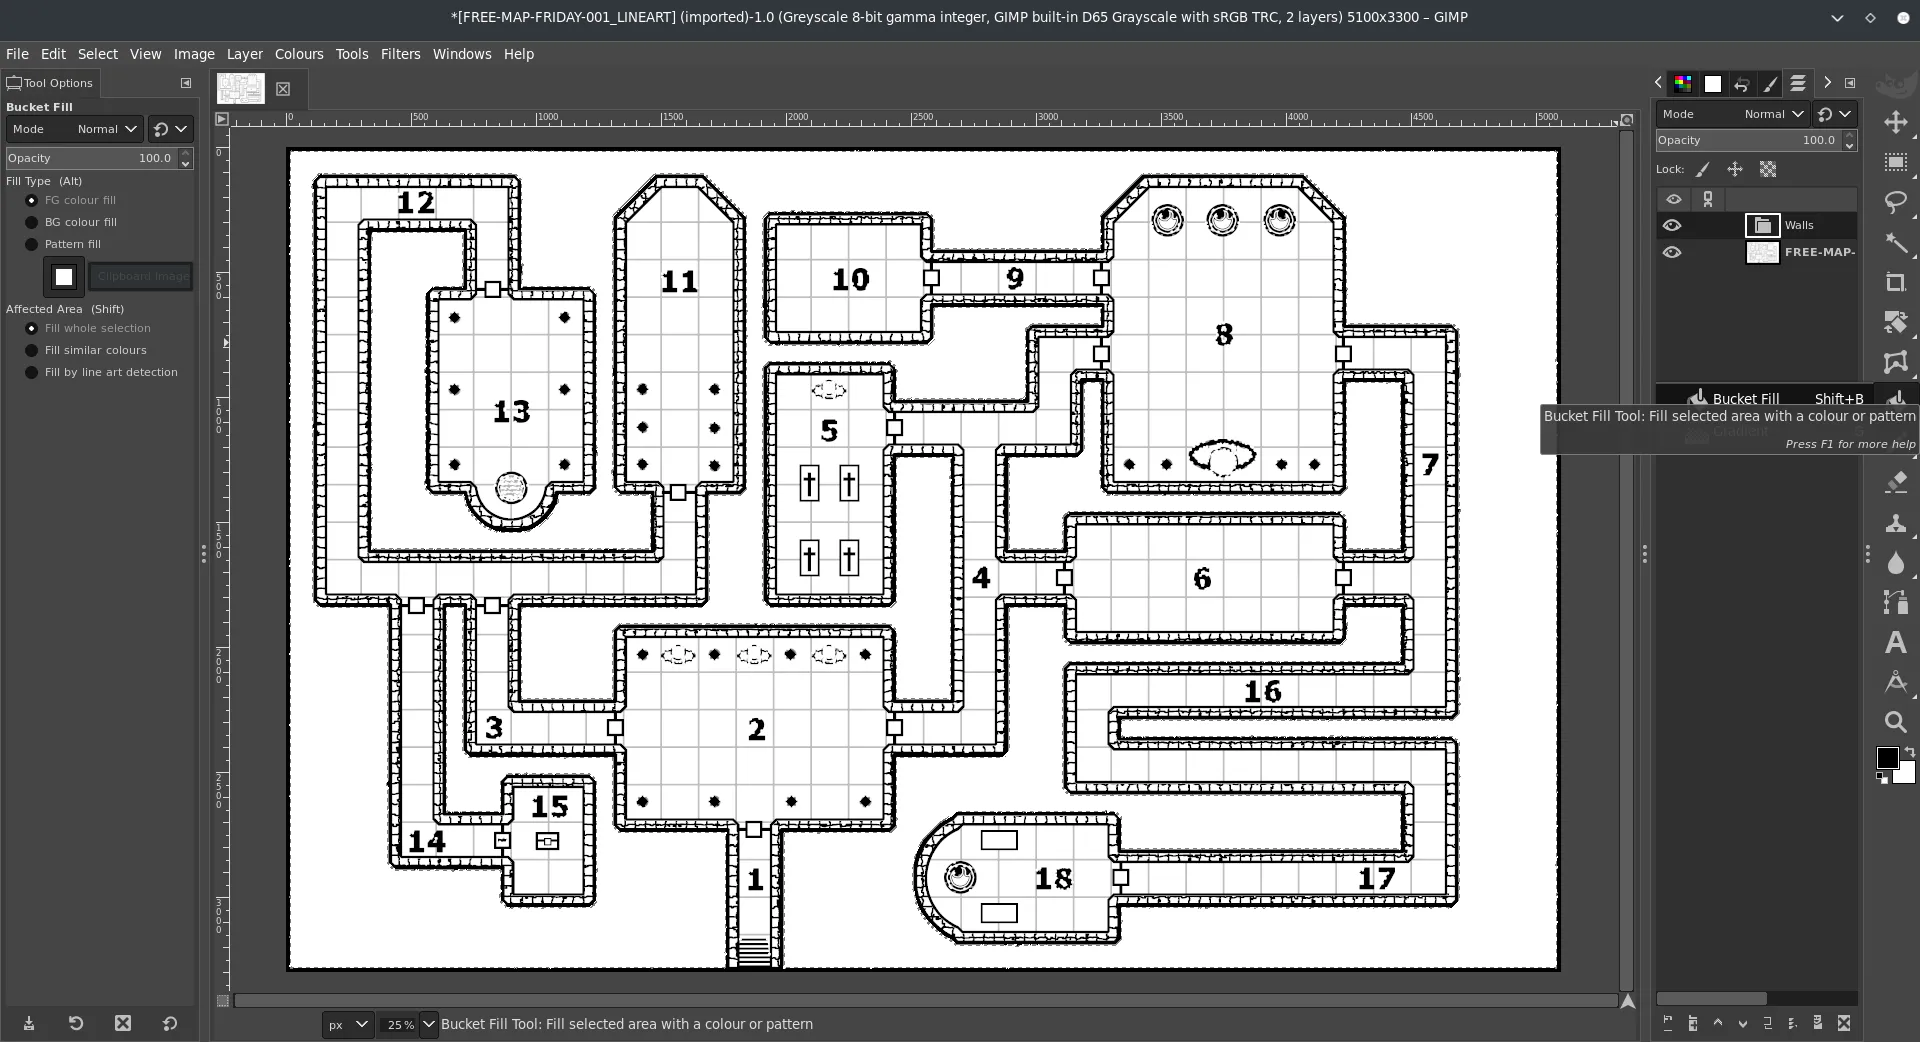
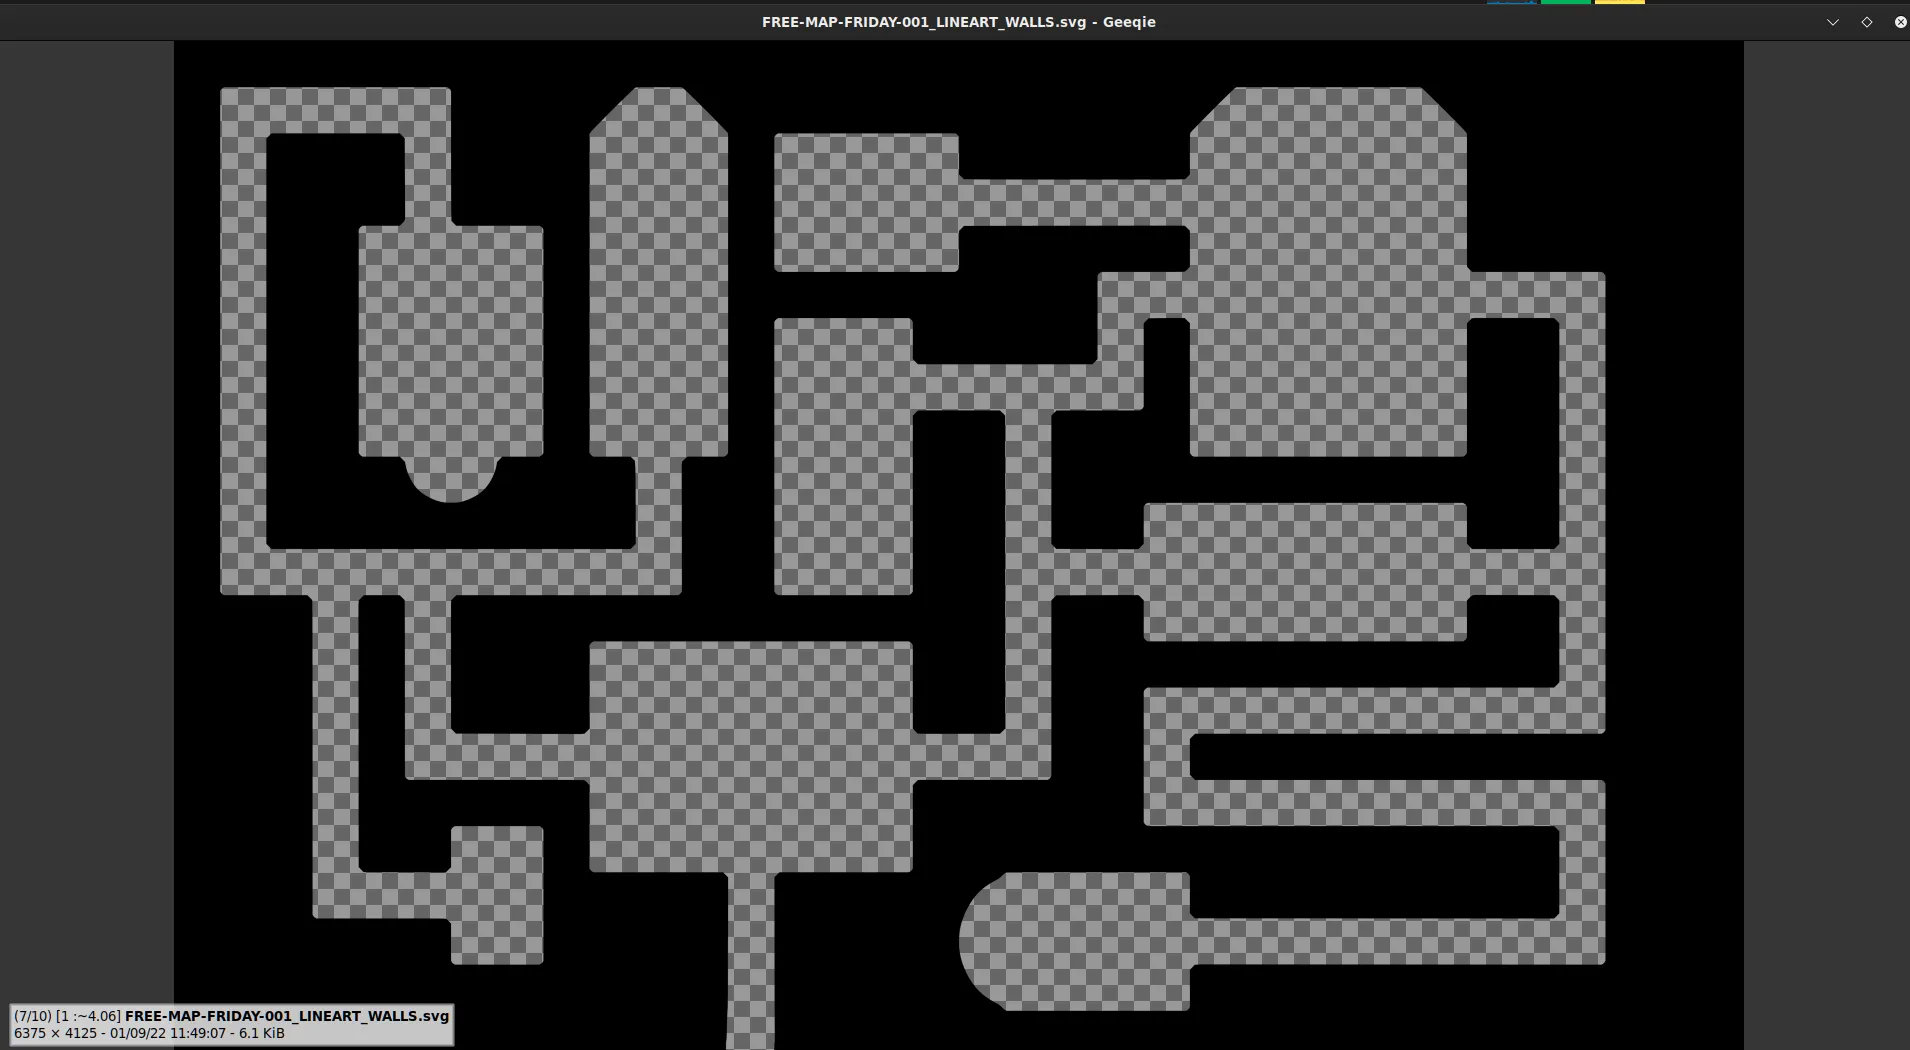
For this method I will pick a random map from Free Friday Maps. Which you can get here but any map will do so long as it has a few key characteristics.
-
It has a black and white version and
-
it has a no-grid option.
These are not essential but it just makes making the mask a little less time consuming.
So this is the map I will start with.
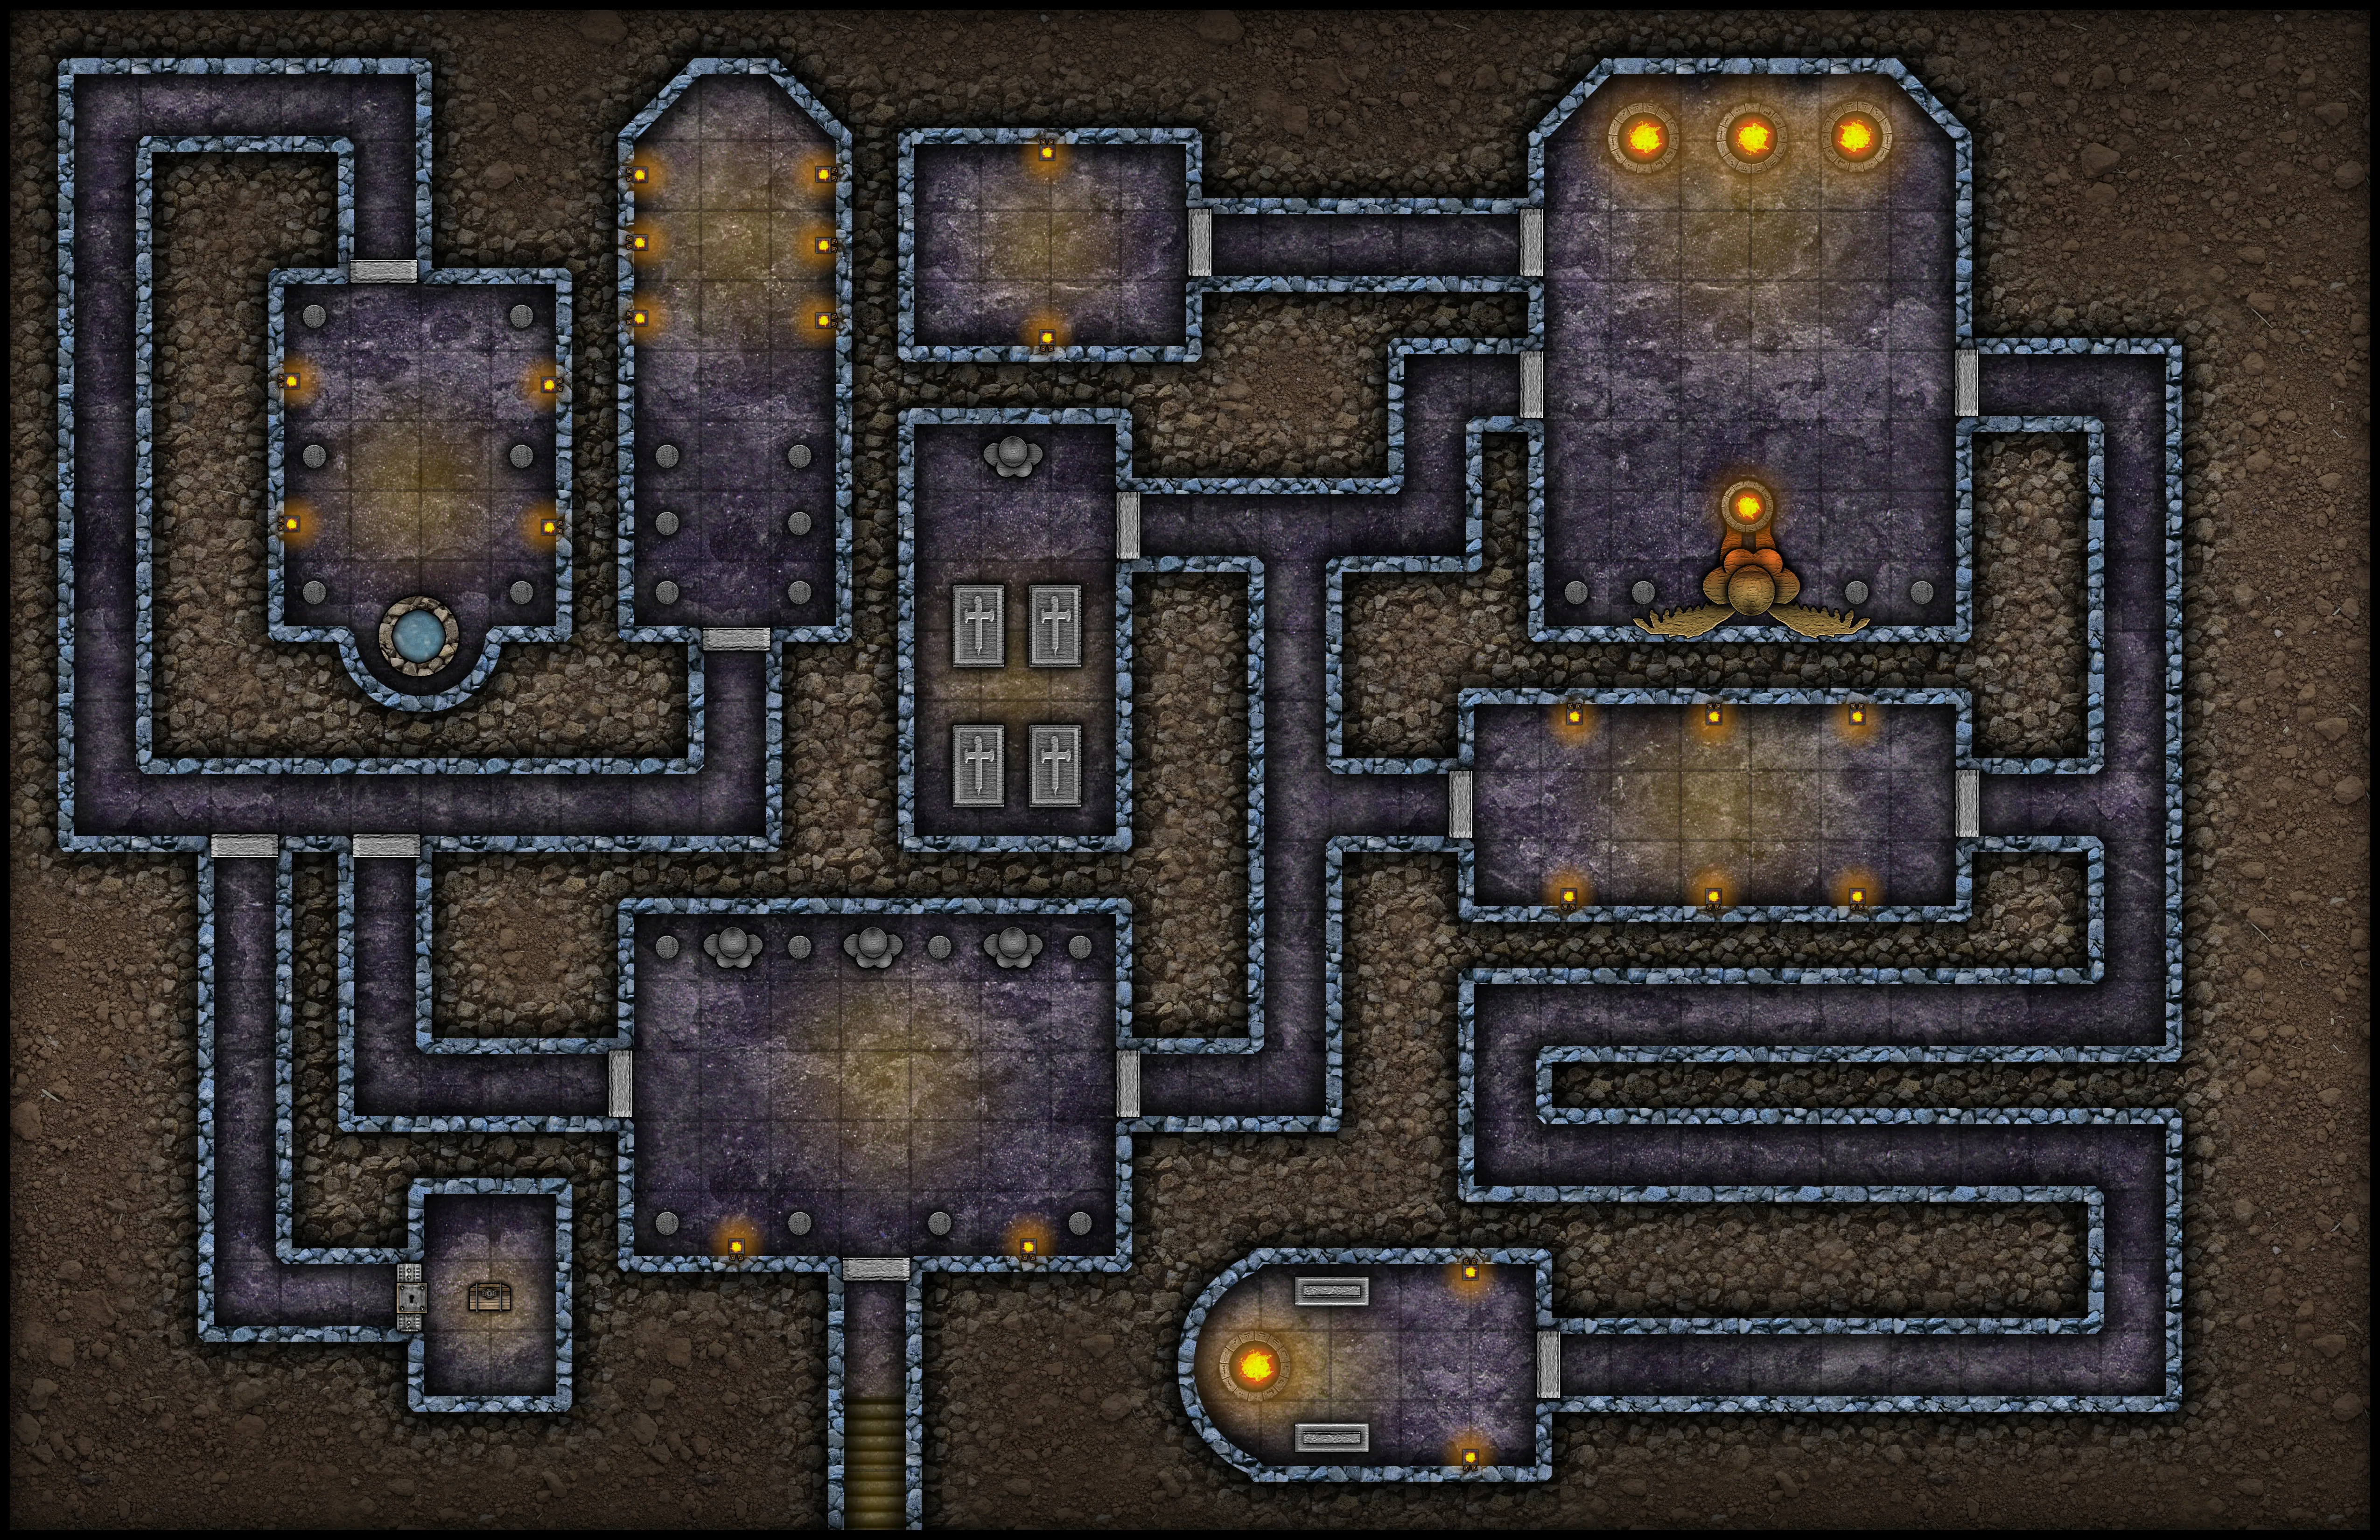
It comes in a few types include Lineart. Which is what we will use.
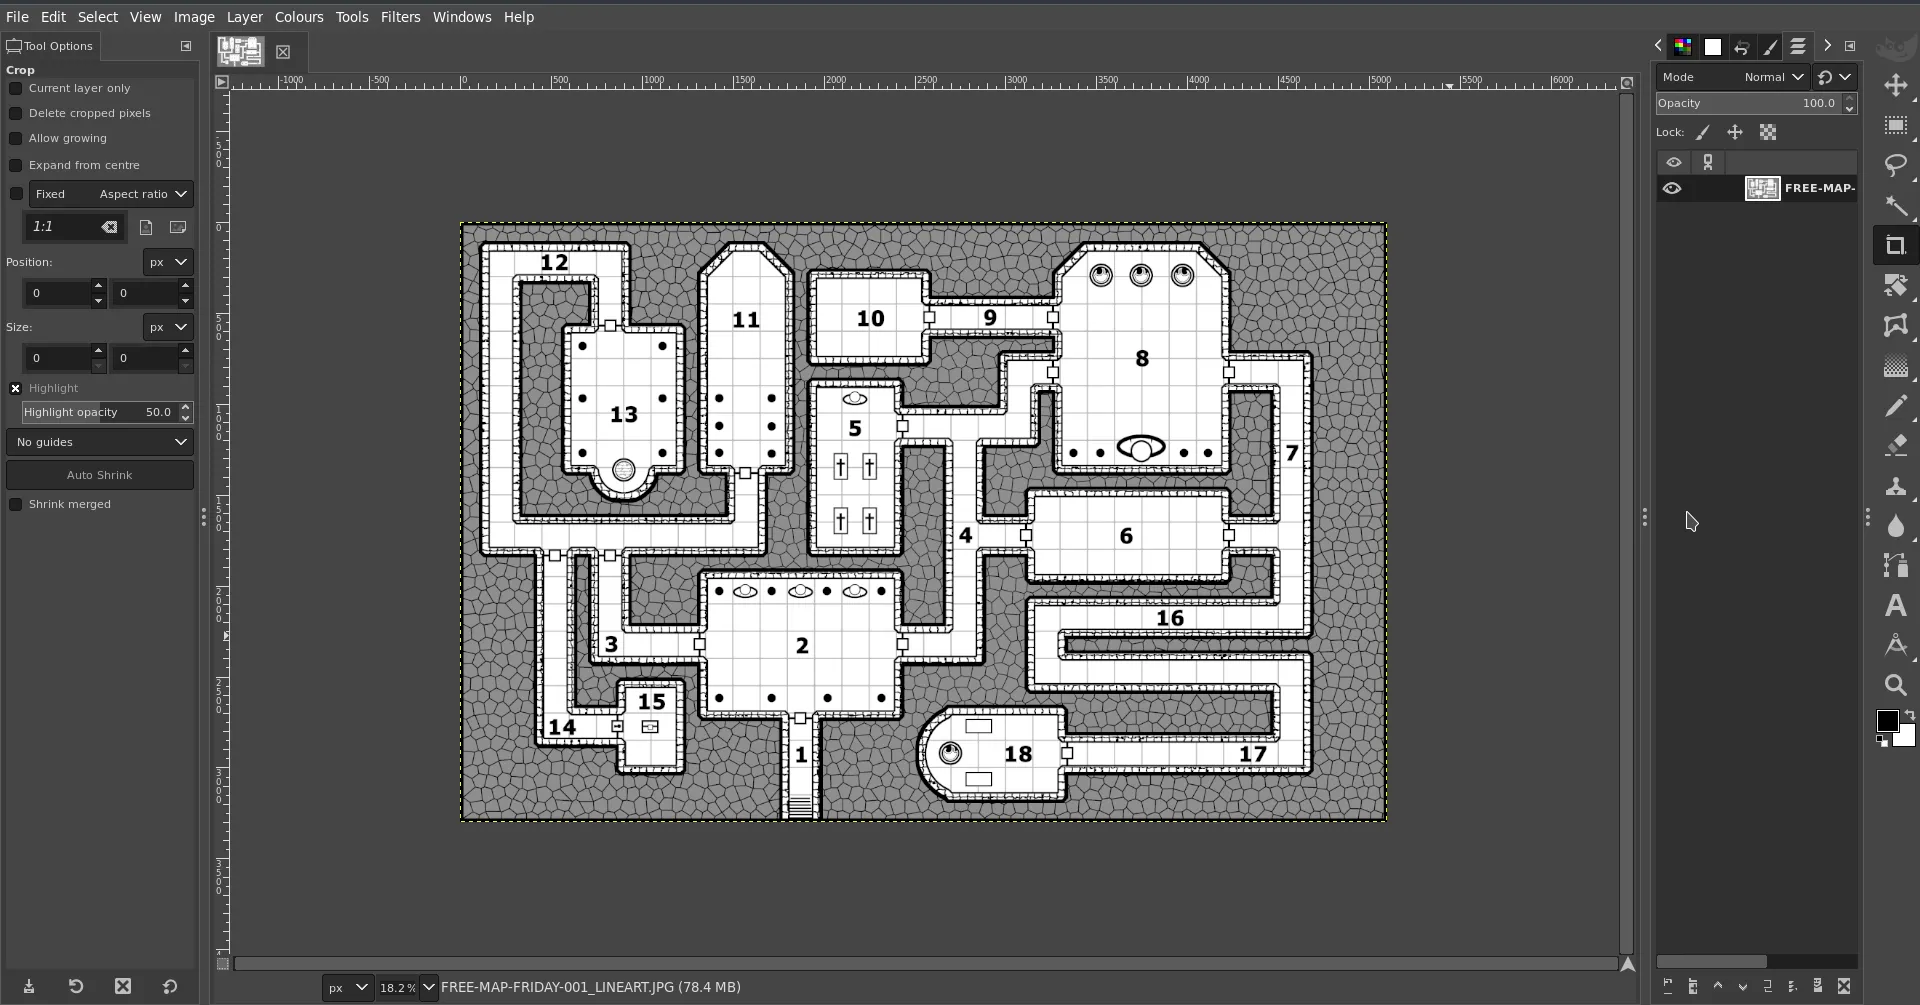
Removing the background
In this map is has some irregular hashing around the map for a background. Fortunately though it is a different colour a sort of grey. So selecting the Fuzzy select/Colour Select tool, choose Colour Select select one of the grey areas of the background and you should see all the grey become highlighted.

This is good, but, because the lines between them are not selected, if were were to delete them now it would just leave the black crazy paving look.
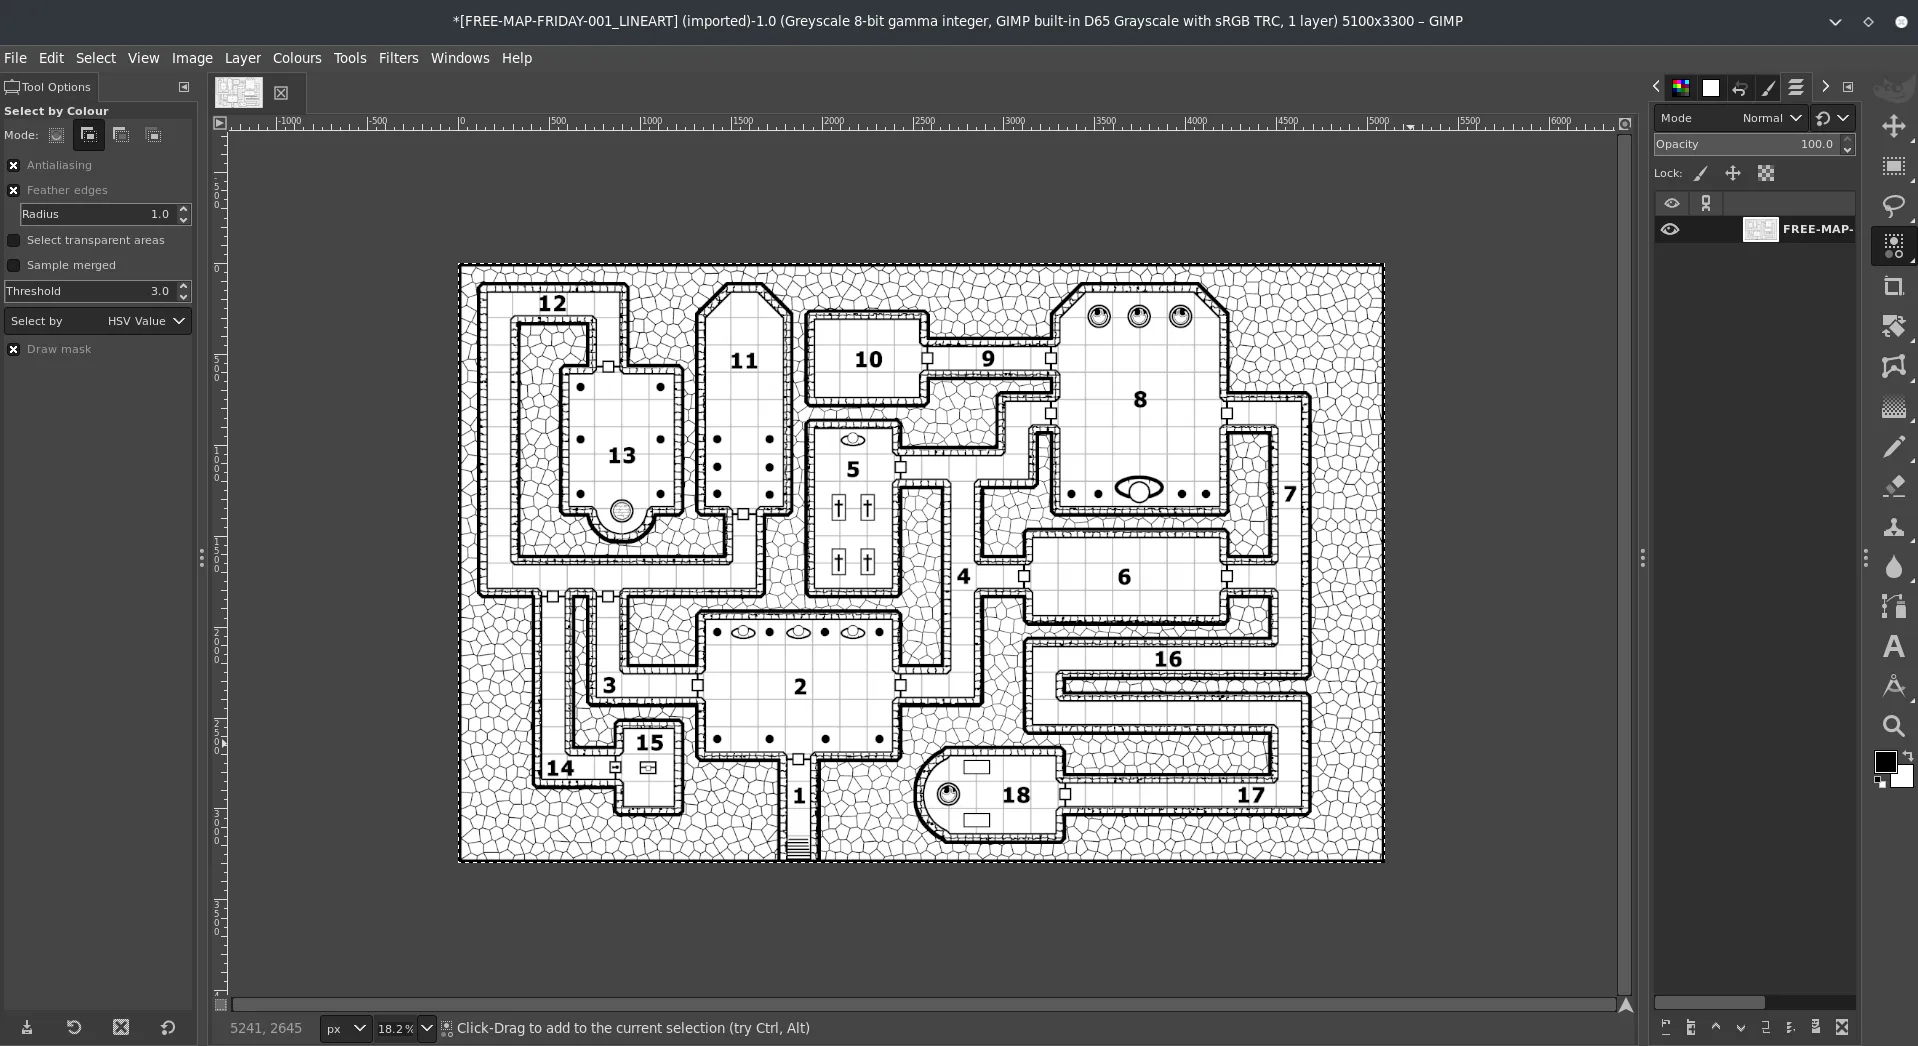
So while everything is selected right click on the image go to Select > Grow...
Grow the selection a few pixels until it covers the lines between the grey spots. Once you are satisfied you have caught it all, press Delete and POOF the background disappears.
Now go back to the Fuzzy Select and this time choose Fuzzy Select. Click on the now white background and see everything is selected.
- Note if you have enclosed spaces, like this map does, you need to hold the shift key and click in it to add that to the selection.
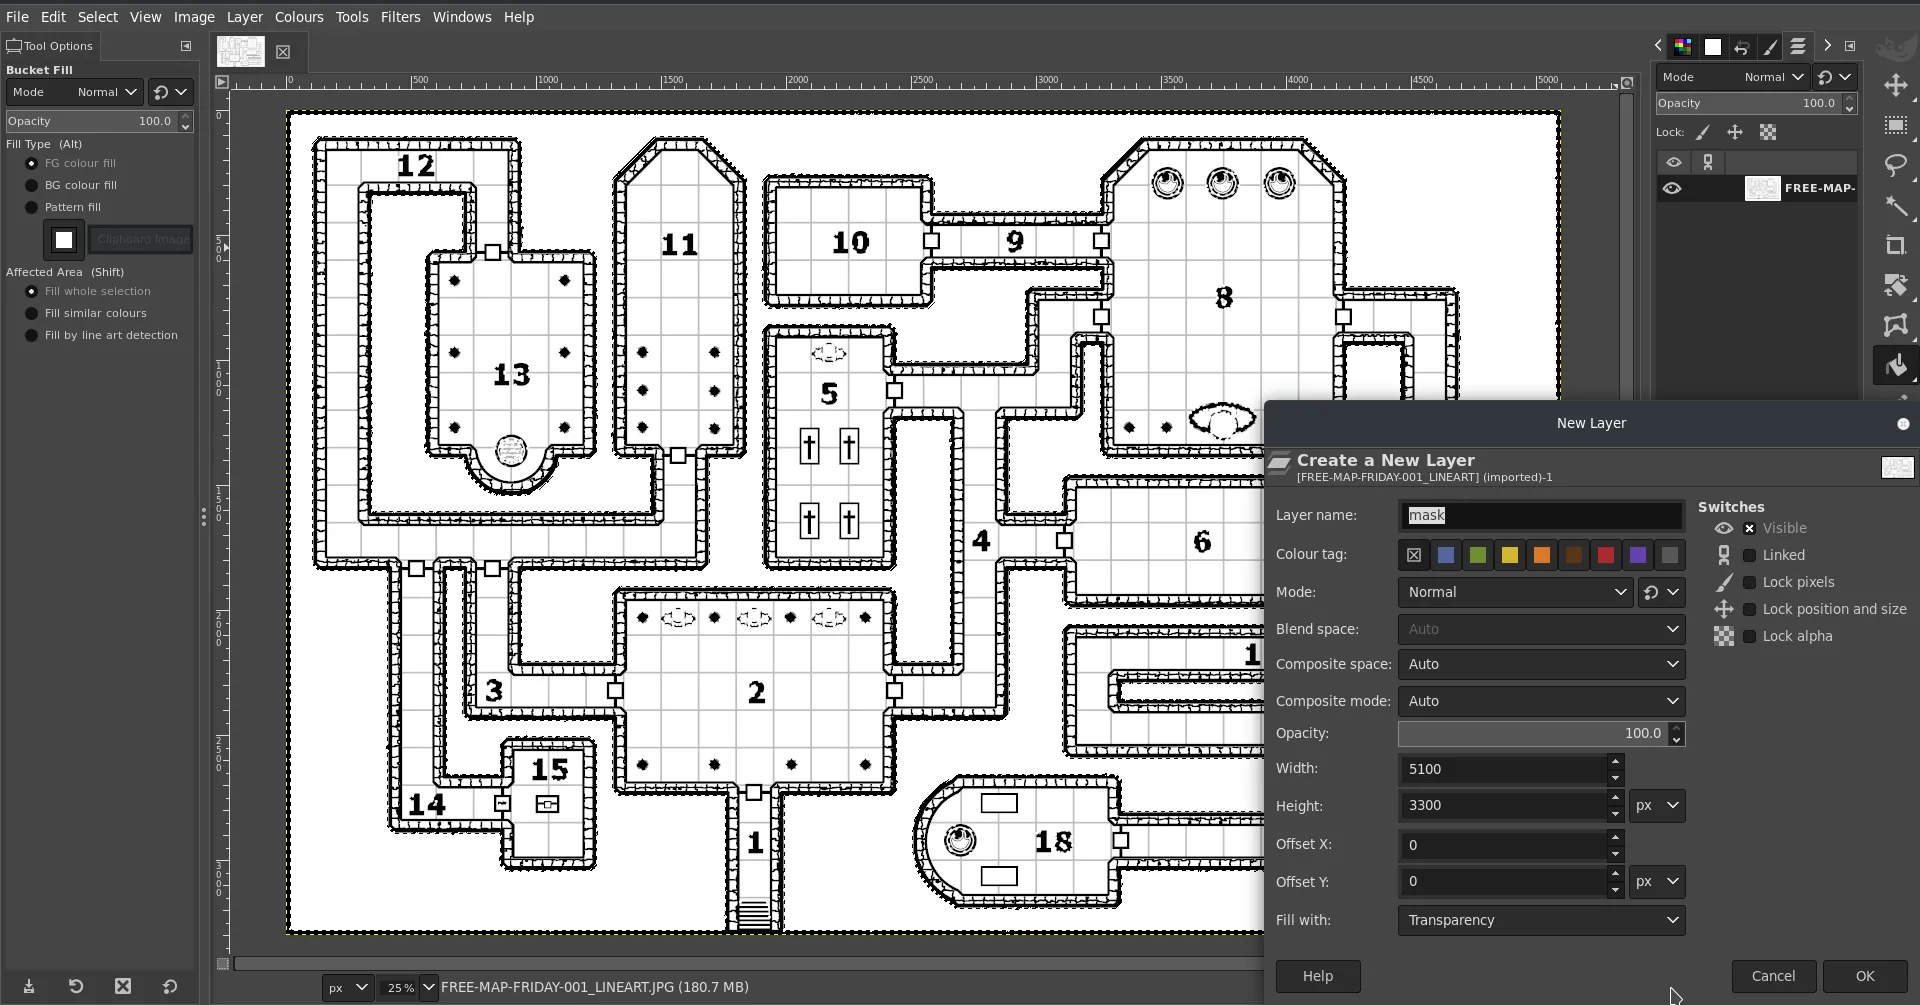
Now in the Layers panel add New Layer Name this layer mask.
On that layer select the Bucket Fill tool. Click on the selection of the background you did earlier and it should fill it all black.
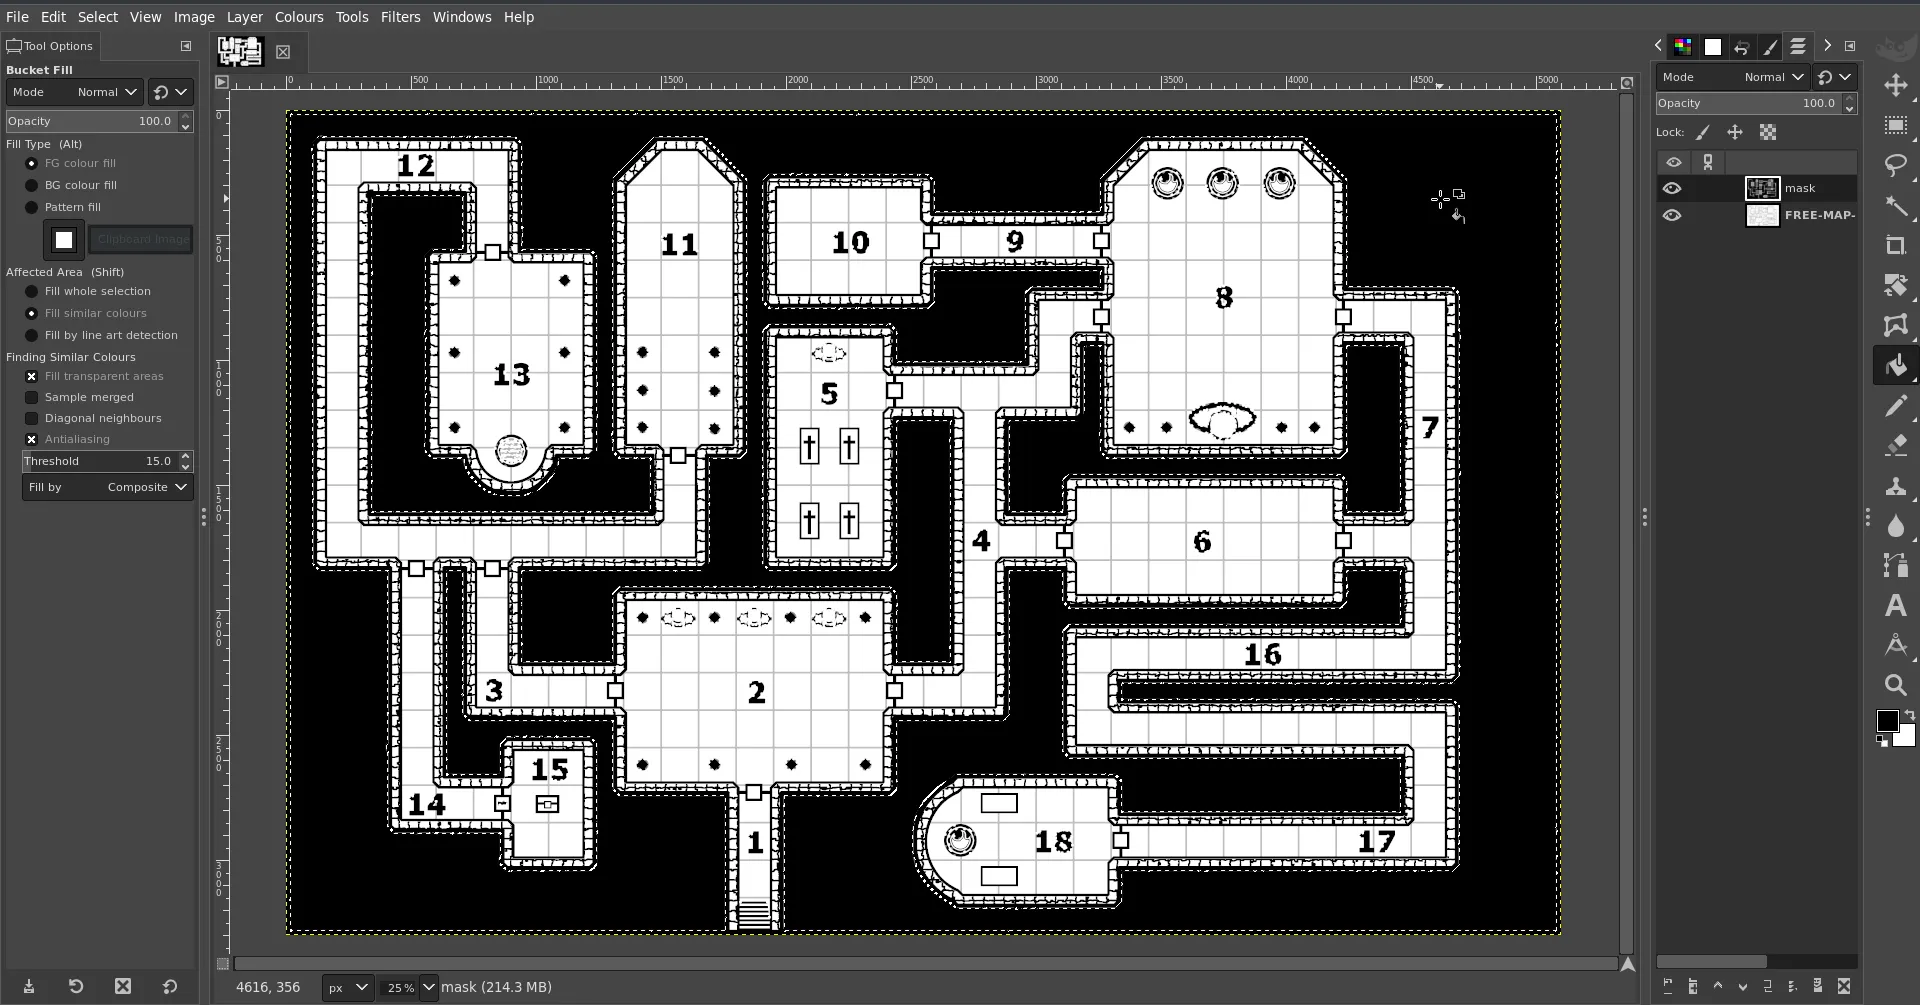
Hide the line art layer and check you have a complete mask wth no missing bits.
If you did miss something, don’t panic, just press Cntrl-Z to undo and go back to selecting the parts you missed before.
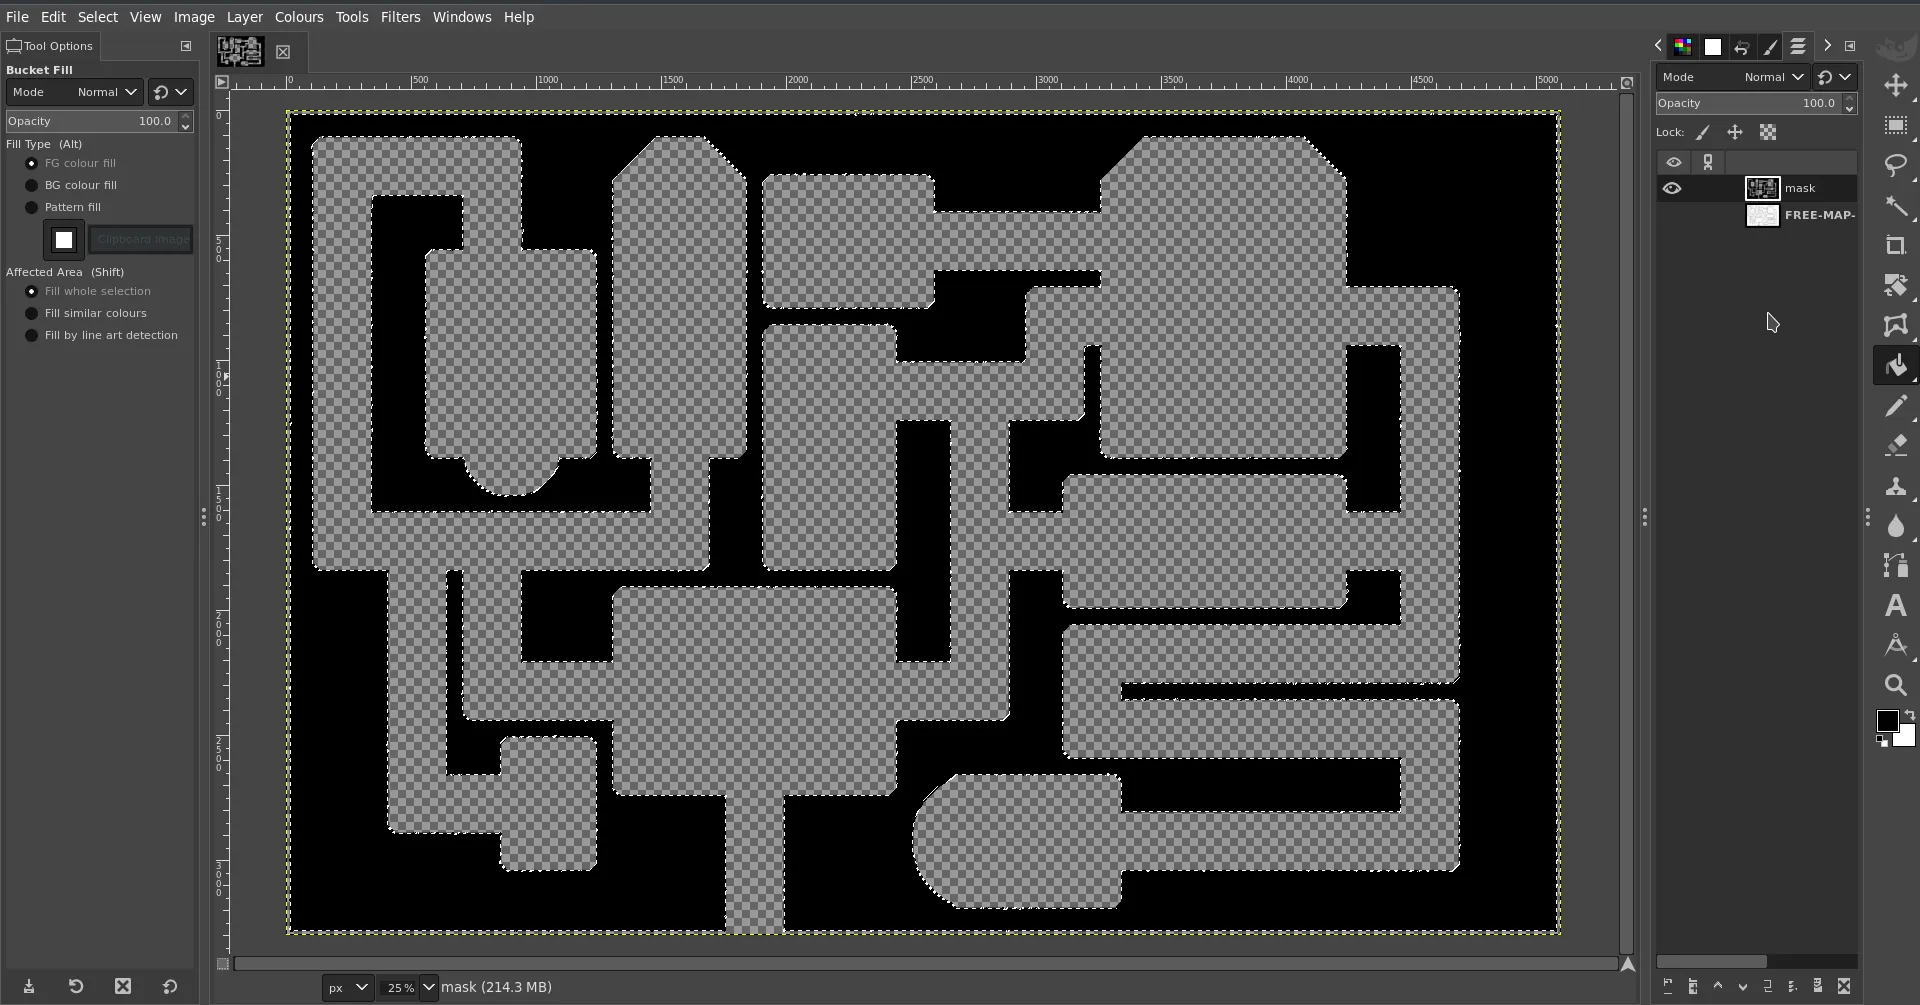
Depending on the map and how you selected the background some doors might also be painted. You will have to do is with the Erase tool and whatever shaped brush fits best, go over all the doors and secret doors and remove the black.
If you don’t do this you will make a door impassible. You can always add door tokens to any opening you have made once the map is imported and the walls added.
Once you are happy with your mask you can delete the line art layer.
The next part is vital if you want to convert it properly to SVG, which is what PlanarAlly uses for walls.
Right click on the image and go Image > Mode , if you imported the Line art, like I did, it would have been greyscale. Sometime you will need to convert an colour map to greyscale to make it easier to delete backgrounds etc. But now the mode must be RGB. Change the image to that.
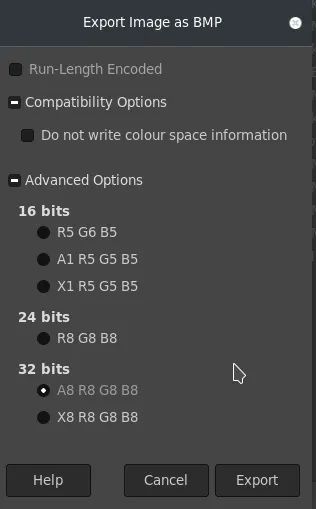
Then right click on the image go File > Export As... and save the image as a BMP Turn OFF Run Length Encoding Turn OFF Do not write colour space information and make sure under Advanced you are 32 Bits
Once that is saved you can either use the command line potrace or you can do it online for free from this website
The command to do it yourself is extremely simple.
potrace -s FREE-MAP-FRIDAY-001_LINEART_WALLS.bmp
This should give you an svg that if you open up in graphic program should be black, where the light will be blocked and clear where the light can shine.
Method Two
Say you have an irregular map or the background is not so easy to remove. Well you can still hand make a mask just using normal tools.
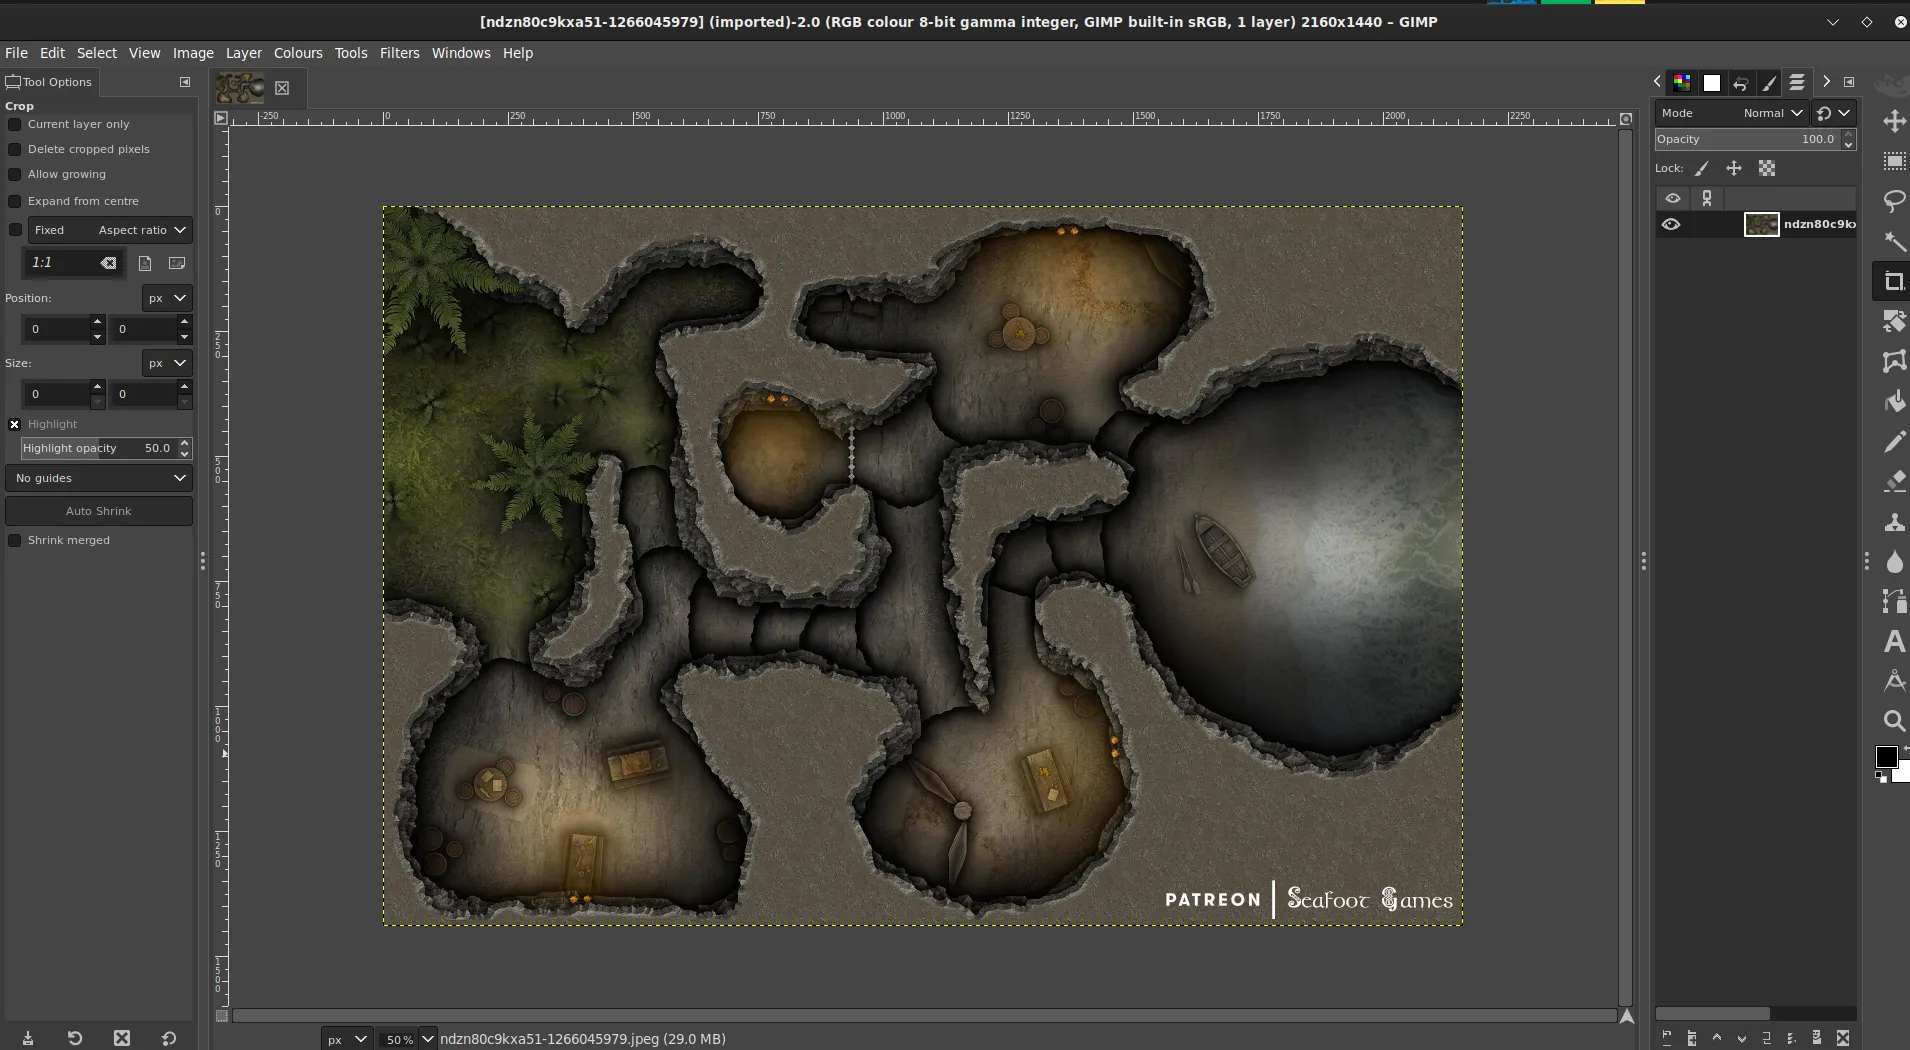
For this example I will use this map
Import the map into gimp.
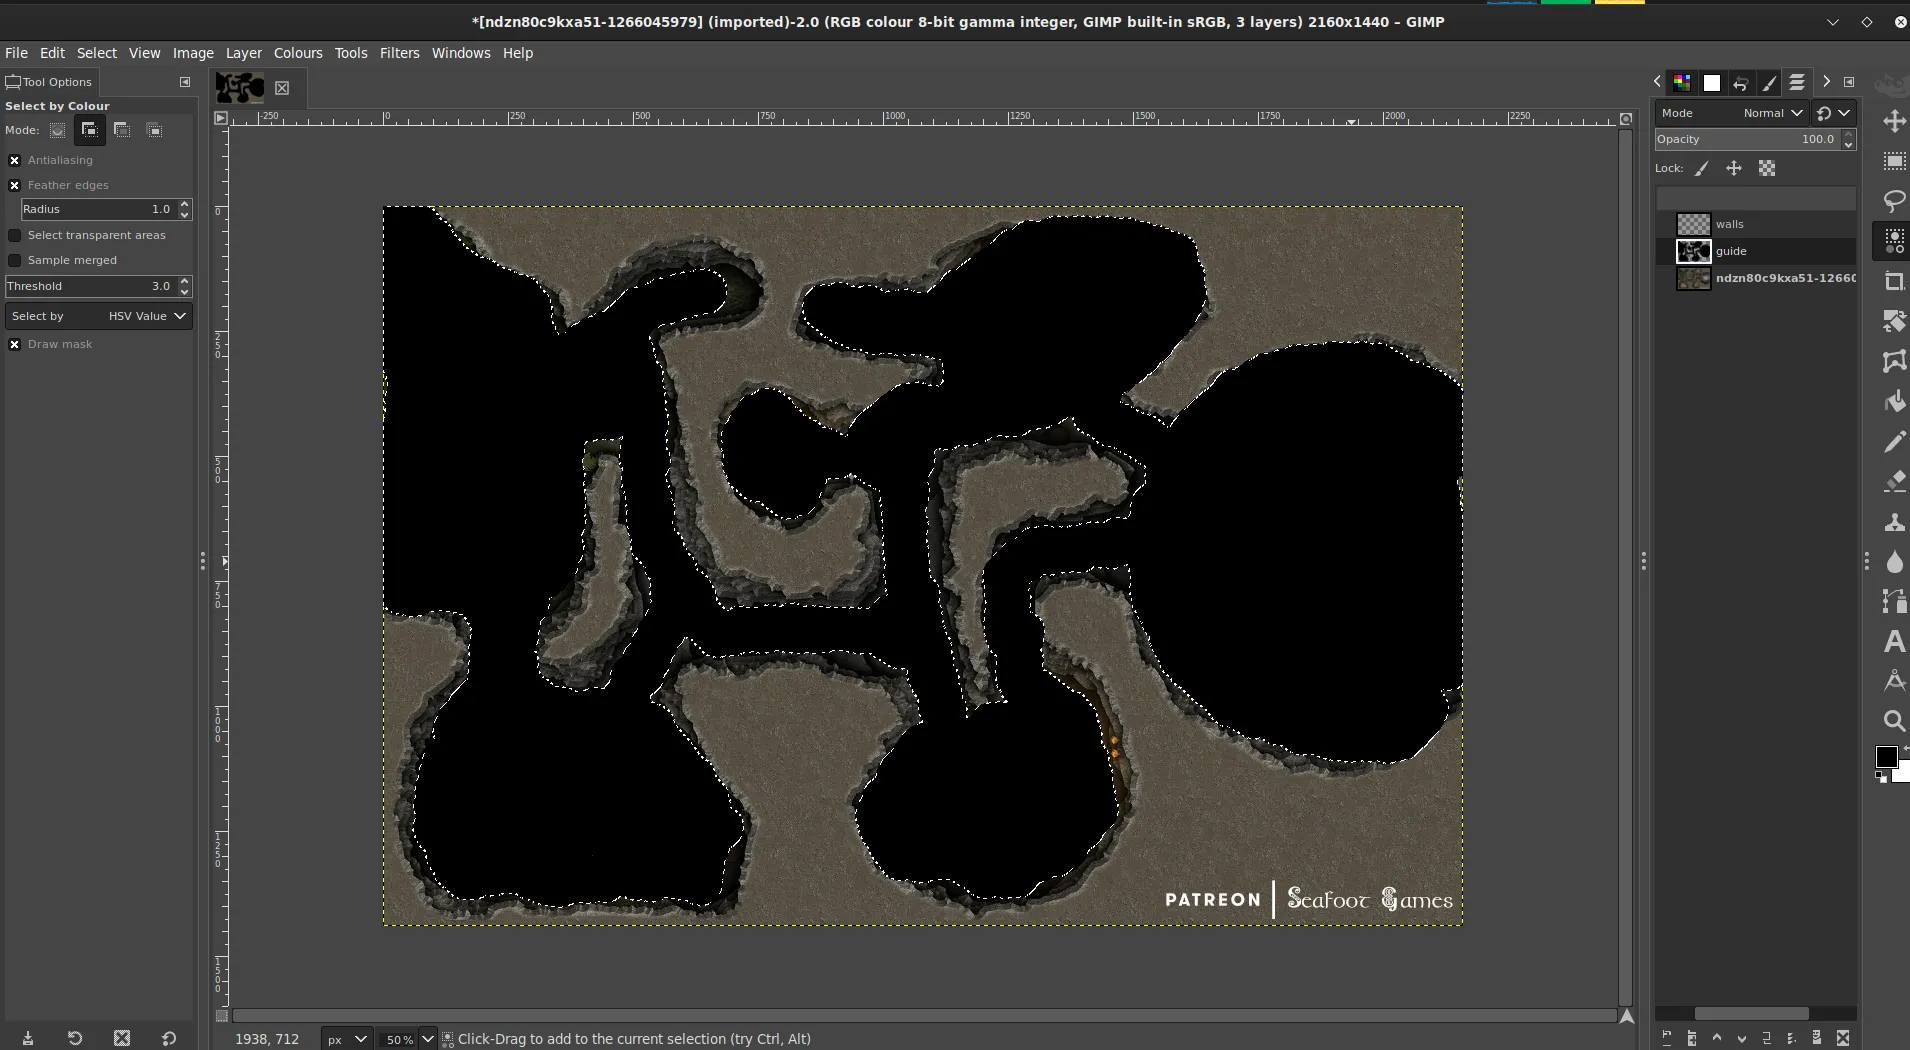
Create a new layer, call it guide.
With the Pencil tool select the Circle as a brush and make it black. Resize as needed. Making sure you selected the guide layer, start drawing on the coloured portions of the map within the walls.

 Once you are happy you have all the shape filled in, create another layer called
 walls.
On the guide layer use the Select by colour tool and click on the black guide you have made. Then invert the selection.
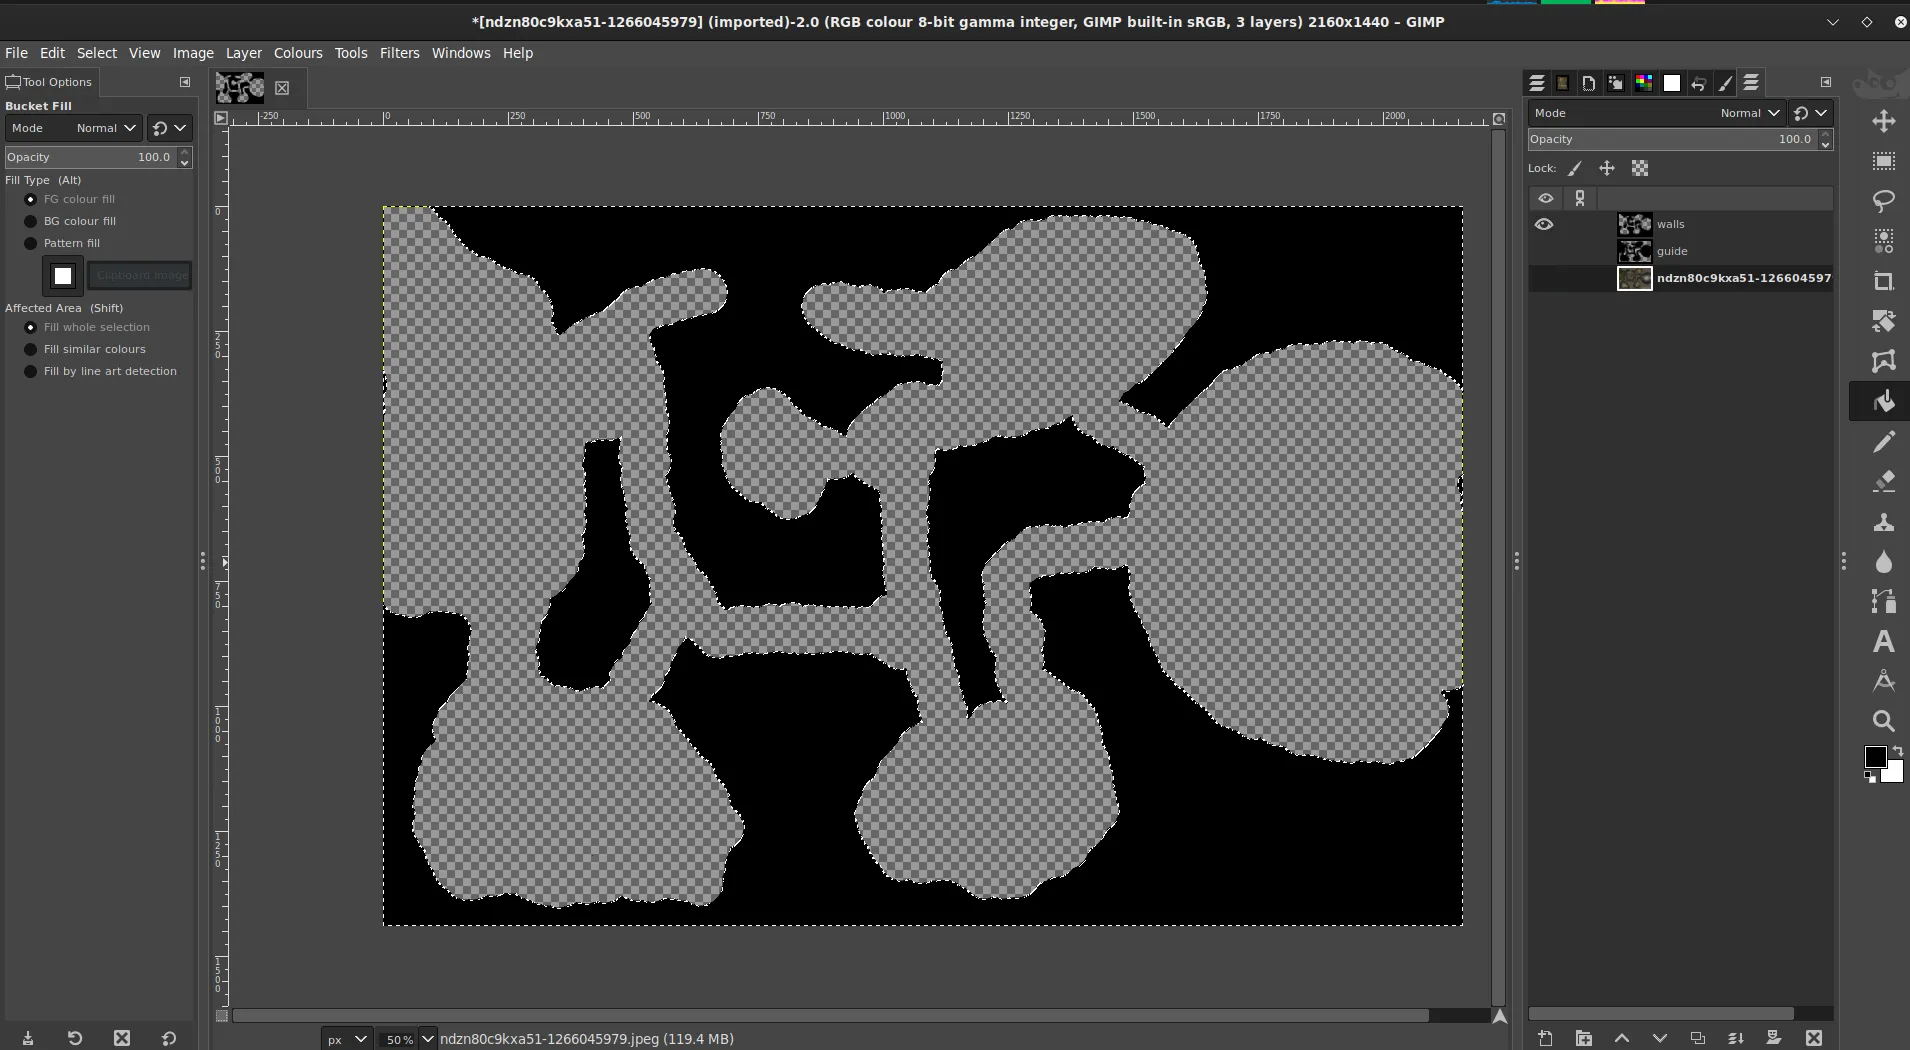
Then on the walls layer use the bucket fill tool to fill in the inverted selection with black and fill out the walls.

Once that it done hide the previous layers and if you are happy you have not missed anywhere, delete those layers and save the image as BMP as above to be converted using either method above.
Importing Walls into PA
Now upload this SVG to your Assets folder on PlanarAlly along with the Playermap and GM map if there is one.
Drag those assets into a location which the player map being on the MAP layer. and the GM map beng on the GM layers. On the MAP layer right click on it, bring up Properties and set a Name and under Advanced tick Blocks Vision/Light and Blocks Movement. Then go to the Extra tab and under Lighting & Vision > Upload walls. Select the SVG you just uploaded to your assets. Your walls should now be applied.
Test it with a token that has a light source on the Token layer and you are nearly done. Now if there are doors or secret passages they have to be manually isolated off with door tokens or FOW, your choice. But all being well you should not have to worry about hand crafting walls again.
Happy gaming!
*/}