Locations
The Locations Tool provides multiple instances of a set of layers with their own settings, each instance hereinafter referred to as a Location.
The Location Bar
Only the DM can actively access and manipulate Locations. This is done by clicking on the symbol at the upper left corner of the screen. As this is ‘DMs-only’ function, players cannot see this button. Players only interact with one canvas at a time; for them, each new Location looks like a different map (i.e. a different set of stacked layers).
Once opened, in its first line, the Location Bar shows a button to create new Locations on the Left, followed by items for each of the Campaign’s locations. The current location is highlighted by white text and , while every other location’s text and buttons are white with a reddish hue. Each item of the list consists of a handle to drag locations, a display of the location’s name, and a button to access the location’s individual settings.
Each location with players present at the location, also displays a tab reading “Players” that can be expanded to show a list of the individual players present on said location.
In its second line, the Location Bar shows a button to access archived Locations. If no Locations are archived, the button will appear slightly transparent, turning fully opaque if at least one Location is archived.
Clicking the symbol again will close the Location Bar.
Create and Reorder Location
Clicking on the ”+” button on the left of the Location Bar will open a dialogue asking you for a name of that Location. This name can be edited later.
Clicking and holding on the ‘nine-dots’-symbol allows to reorder Locations freely on the bar, as shown in the video:
Location Settings
A newly created Location inherits the Campaign Default settings that are defined in the settings. Some of the settings defined there can be overridden for each session, individually.
The Location Settings can be accessed by the symbol on the respective Location’s item in the Location Bar. Location Settings will open a dialogue with three tabs: Admin, Grid, and Vision.
Every setting that was set to override the Campaign Defaults will stay that way until reset. Manually defining a setting to match the value also set in the Campaign Defaults will not re-establish the link to the defaults but instead keep this value despite any further change in the Campaign Defatlts.
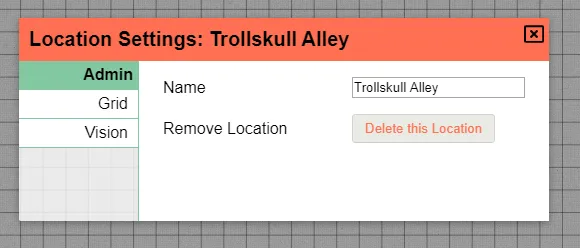
Admin
The Admin tab in the Location Settings allows you to rename, archive, or remove the location.
Archived Locations will disappear from the Location Bar.
To restore an archived Location to the Location Bar, access the archive via the Show archived locations button in the location bar.
This will open a list of all archived Locations.
They are restored by clicking select.
You can only archive or remove Locations where nobody, neither players nor DM, is present.
Grid
See ‘Grid’ in the Campaign Settings.
Vision
See ‘Vision’ in the Campaign Settings.
Change Locations
With the Location Bar opened, the DM can change the location as easy as clicking on the block displaying the name of the desired location.
Players cannot change the location on their own. Upon invitation, Players will join an existing location that is occupied by a player (whether or not this player is logged-in at that time). If there are no other players listed in the campaign, the first player to follow an invitation will join the location the DM is active at. Players will stay at their active location until dragged to another location by the DM.
Players can be dragged as a group, or individually, as shown here.
Players that are sent to another location do not take any of the shapes they control with them. Instead, those shapes have to be sent to that location by the DM.
Moving shapes to another location
If a location has one or multiple spawns, shapes can be moved to this location individually or as a group via their right click context menu.
As a DM you can create one or multiple spawns by rightclicking on the area you want the spawn to be and selecting the ‘create spawntoken’ action.
When sent to another location, shapes will appear centered on the chosen spawn location, which is a special shape that appears on the dm-layer.

The spawn location designator can be moved freely on the dm-layer. Since 0.23 you can remove and create as many spawn locations as you wish.